LOADING...
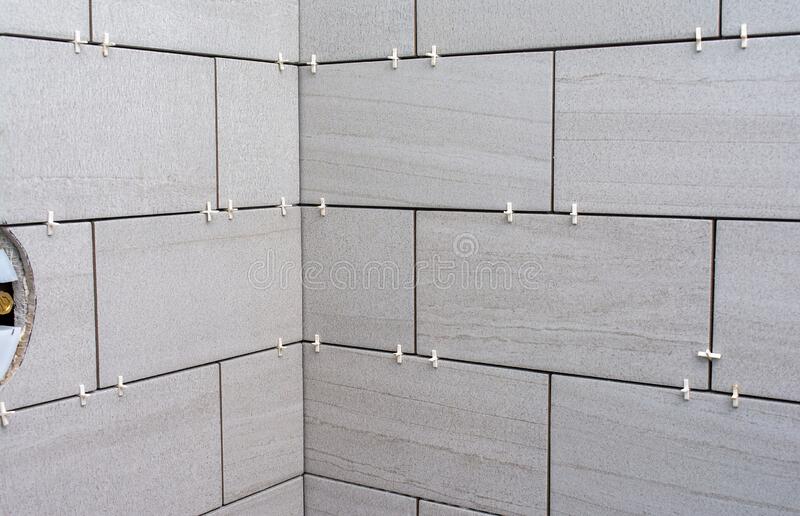
Tile spacers are plastic objects either made in T or crossed shapes that are placed between the tiles to maintain a constant and consistent spacing between the tiles. The spacer creates a gap that is filled by grout, which would finally give a symmetrical finish to the surface.

Selecting the size of spacer required for a job is often down to personal preference. As such it is recommended that you get the customers opinion on what they would prefer (as the spacers will dictate the width of the grout lines, which are a strong feature of the overall floor/wall design). As long as the job is completed in a way that will be long lasting (i.e. allowing for the movement of tiles for stress relief - 2mm is usually sufficient for walls and 3mm for floors) then the aesthetic side can usually be left to the customer.
Taking British Standards into consideration (as well as common practice) it is recommended that wall spacers are 2-3mm (with 2mm covering the majority of requirements) and floor spacers 3-5mm.
The main reason for providing gap between the tiles is to accommodate for slight sizing differences from tile to tile that are created during the manufacturing process. The gap enables the installer to adjust the tile to compensate for these sizing differences and allow for a straight grout line. Due to the technology incorporated in the manufacturing of tile today, there is very little variation in size and therefore grout joint widths are generally much smaller than they have been in the past. Typically, the grout joints should be minimum of 1-2mm. This specification is mentioned in BS 5385-1 of 2009.
Also, tiles are subject to thermal expansion & contraction, and these small gaps prevent any possible cracking of the tiles or their detaching from the basis. Laying tiles with small gaps also prevents problems in case of mechanical damage to one of them. If the tiles were indeed laid out without joints, it would not have been possible to safely remove one of them.

Installing tiles with no grout line would reduce the space between tiles to the minimum but would not eliminate it. The remaining space would allow water to seep between bathroom wall tiles and for dust and dirt to accumulate in the gap between kitchen floor tiles. Hence, without tile joint grouting, tile fixing is half done process.
Tile spacers allow you to keep your floor level and ensure that each tile is properly grouted with the right amount of product. If your tiles are too close together, you risk damage if they expand. They could also become dislodged or chipped. Spacers provide a more secure, durable surface.